Products
Airbagit
AirBagIt DOOR-LAMBO-10 Lambo Doors Actuator Kit Only Remote
Upgrade to unlock this product- Shipping Cost (lower 48): $11.64
- SKU: ARBGT3102
- Asin: B005J8TL2G
- Manufacturer Part #: DOOR-LAMBO-10
- Qty Available: 25
- Shipped By: 10 days
- Stock: In Stock
Please login to view pricing details.
Product Description
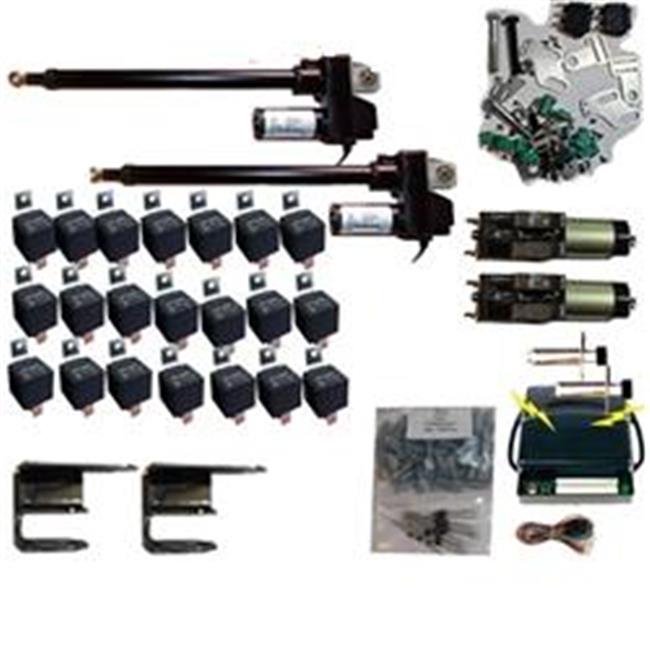
Lambo Doors Actuator Kit Only Remote, 2 Actuators, 2 Solenoid kits, 2 poppers, remote, 4 40 amp relays. Remote Actuators. Doors will remotely pop out & rotate automatically 90 degrees. Do not consider a bolt-on kit because the bolts will "move" and will not line.
- Item Weight - 25 lbs.
- 2x Lambo Door Hinge Assembly.
- 2x Automatic Latch Assembly (A switch assembly inside).
- 2x Shaved Door Kit.
- 2x Linear Actuators.
- 4x Linear Actuators mounting clevis.
- 4x Gas Struts.
- 2x Manual Control Switches.
- 22x 12v relays.
- 110x Relay Connectors.
- 16x Diodes.
- 2x B switch assembly.
- 2x C switch assembly.
- 2x D switch assembly.
- 4x 5/16 Socket Head Cap Screws.
- Install the Lambo Door Hinge Assembly using the installation instructions that are included with the hinges.
- Make sure doors open and close smoothly and are free from any binding or rubbing on other parts of the car.
- Install the Linear Actuator with the door swung open but still in the down position. Extend the linear actuator out ½ In. from the collapsed position.
- Install the C switch assembly underneath the linear actuator mounting clevis. Adjust the switch to make contact with the pivot block when the door is in the down position.
- Install the B switch assembly as shown in the attached diagram. Adjustment of the B switch will be done later.
- Install the D switch assembly as shown in the attached diagram and adjust the D switch all the way towards the outside of the car.
- With the door still swung open position the latch assembly behind the hinge as shown in the attached diagram. The two set screws will need to be removed from the hinges to allow the latch to be positioned right. Position the latch release forks underneath the pivot block. The latch pin will need to make contact with the top of the pivot block to prevent the door from swinging close. Apply a</ amount of bearing grease to the pivot block where the pin makes contact.
- Tack the latch in several spots so it can be adjusted if necessary.
- Using a 12v power source and a ground manually extend the linear until the door closes.
- With the door closed adjust the D switch in so that it makes contact at the point when the door is closed.
- Using the same 12v power source manually collapse the linear actuator. When the door is swung open the latch pin will pop out and will prevent the door from closing.
- Using the same manual control system as the previous step extend the linear actuator out until the door is in the vertical position.
- Adjust the B switch so it makes contact when the door is in the vertical position.
- Manual collapse the actuator to bring the door to the down position. Using a screw driver retract the latch pin and check to make sure the pin retracts out of the way of the pivot block.
- Manually extend the actuator until the door closes.
- Manually collapse the actuator to double check the pin will pop out when the door is swung open.
- Using the attached wiring schematics, route all the wires to the switches. It is recommended that the wires be soldered to the switch connectors.
 upgrade to unlock this product
Lambo Vertical Doors Hinge System 4-Strut
upgrade to unlock this productLambo Vertical Doors Hinge System With Hinges And 2-Actuators 2-Strut
upgrade to unlock this productLambo Vertical Doors Hinge System 2 Actuators, 2 Strut
upgrade to unlock this productLambo Vertical Doors 8 In, Actuator 16 In.
upgrade to unlock this productLambo Vertical Doors 2 In. Actuator
upgrade to unlock this product